This blog post has been created for completing the requirements of the SecurityTube Offensive Internet of Things course.
Offensive Internet Of Things Exploitation
Student ID: IoTE- 778
Overview
During the Offensive Internet Of Things Exploitation course the instructor demonstrates a technique called a “NAND Glitch” on a Wink Connected Home Hub IoT device.

This technique allows a root shell to be acquired on a device which normally does not provide console access. This post outlines the process I used to replicate the NAND Glitch as well as discusses some of the “gotchas” that I encountered along the way.
Tools
The tools that I utilized to perform the NAND Glitch were:
- Wink Connected Home Hub
- Bus Pirate - v 3.6a
- Bus Pirate Cable
- Break Away Headers - Straight
- Ubuntu Virtual Machine
- Screen
- Soldering Iron / Solder
Steps
The steps that I performed to gain a root shell on the Wink Hub device are as follows:
- Disassemble the device
- Solder headers into the UART connections
- Hook up the Bus Pirate
- Use screen to setup the Bus Pirate for UART mode and various other configurations
- Use screen to connect to the Wink Hub over a UART terminal interface
- Plug in the Wink Hub
- Use a wire to short the 29th pin of the NAND flash chip to ground
- Change the boot arguments to use /bin/sh
- Reboot the hub
- Enjoy root access!
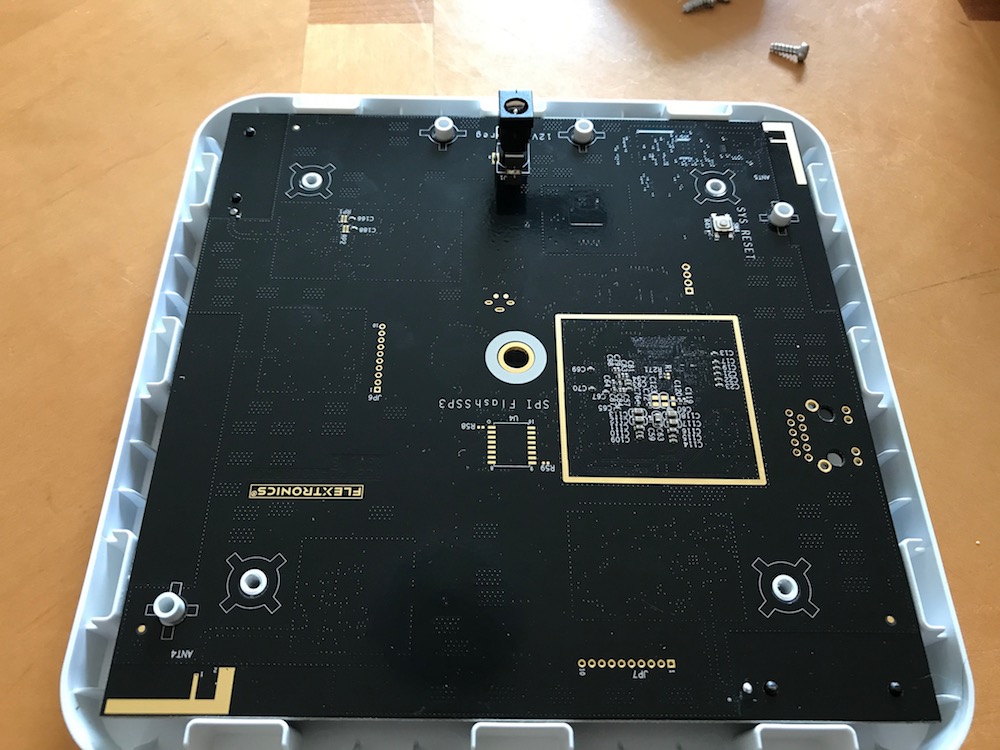
Disassembly
Disassembly of the Wink Hub is pretty straight forward. The device has 4 hex screws that need to be removed. Once these are removed there is 1 black circuit board that makes up the whole device. Pull the board out and begin the hacking fun.
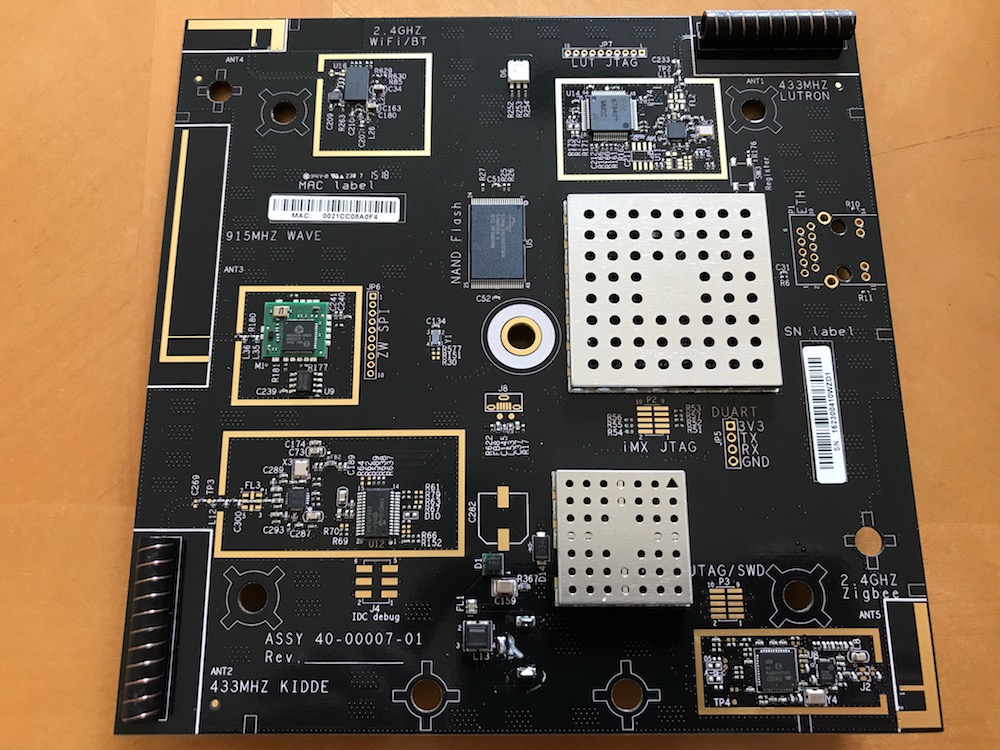
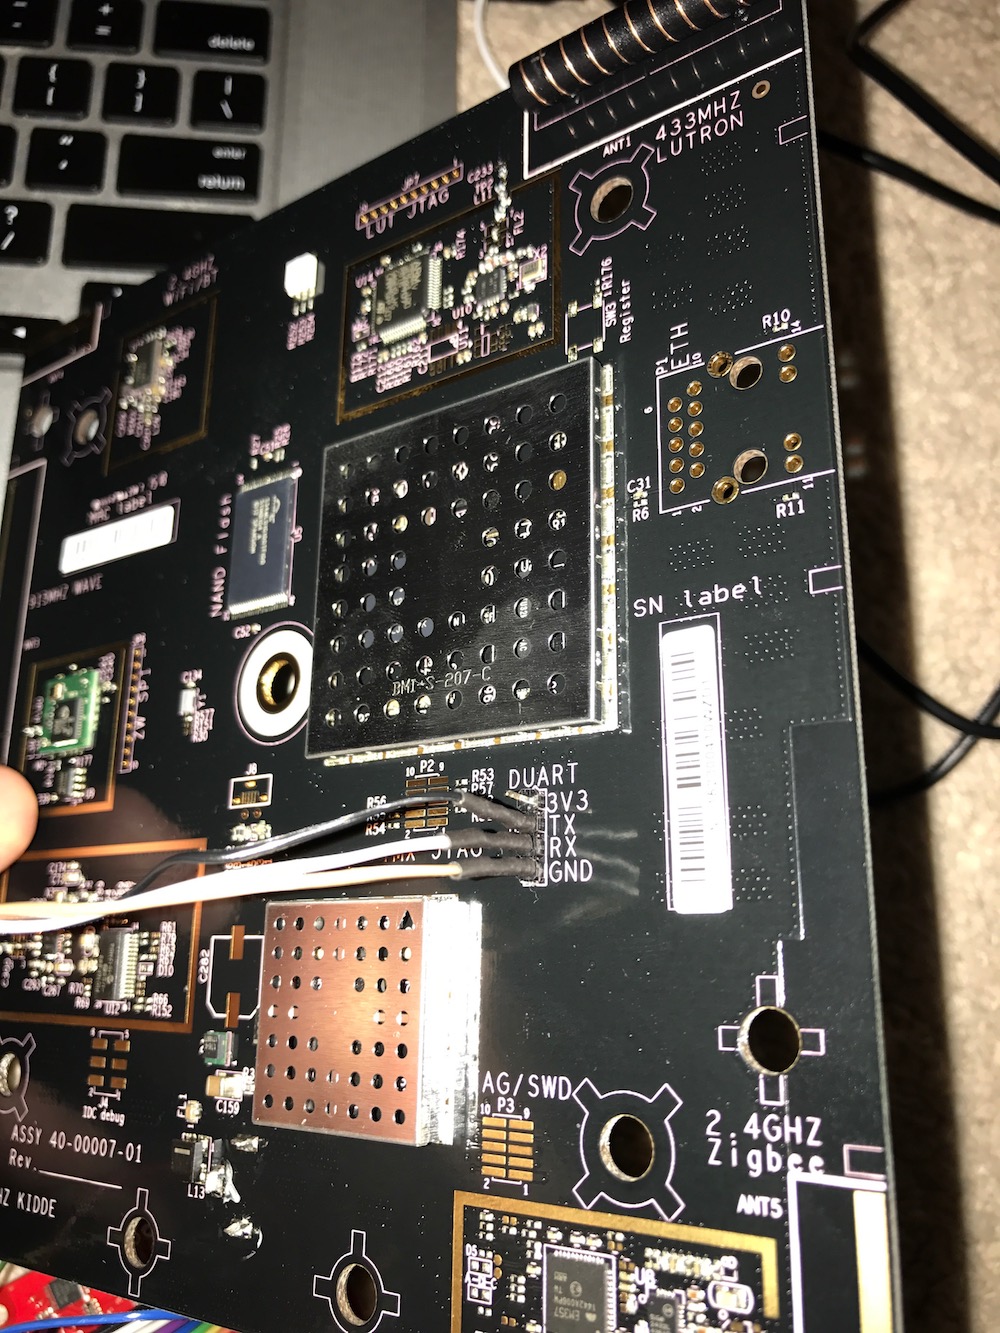
Solder Headers
The Wink Hub circuit board does not have headers attached for UART serial interfacing but it does have the pin-outs marked. Simply solder some headers into the pin-outs using through-hole soldering and you’ll be set to connect to the device. When I did my soldering I hadn’t heard of a “Helping Hand Tool” so my soldered pins looked a bit crooked. This didn’t prevent me from getting a UART terminal connection but I learned that if I need to do more intricate soldering in the future, that one of these tools could really come in handy.
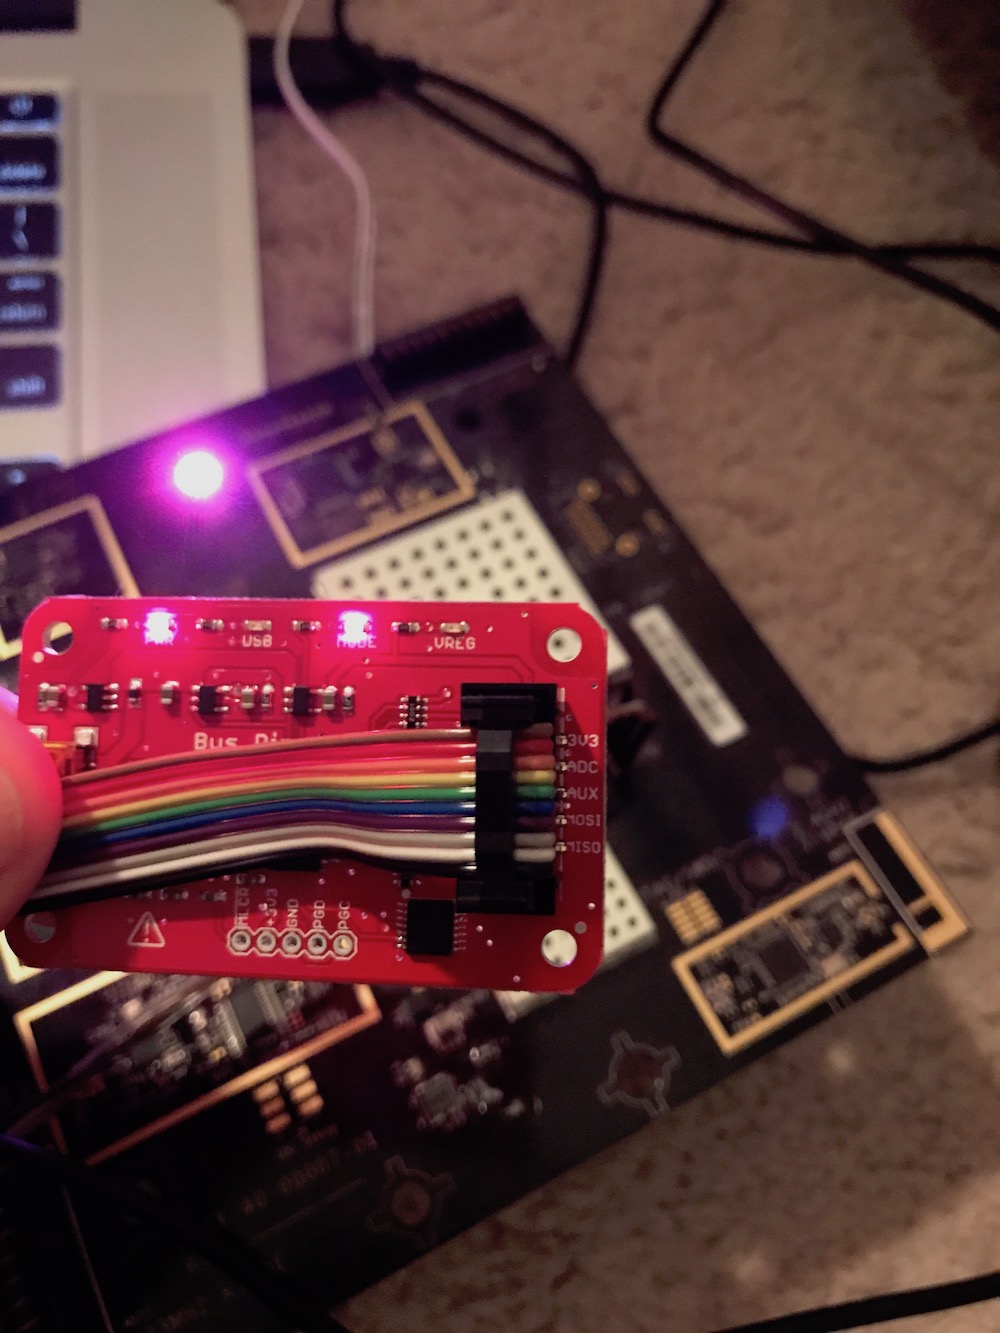
Hook Up The Bus Pirate
Hooking up the Bus Pirate is as simple as:
- Connect the USB cord from the Bus Pirate device to my laptop
- Connect the GND, MISO, and MOSI connections from the Bus Pirate to the appropriate TX, RX, and GND connections of the UART headers
- In VirtualBox, select the usb device that was connected
- Use
ls /dev/tty*to list tty devices - Discover that
/dev/ttyUSB0is the device that will be used
** NOTE: I encountered a bit of trouble / confusion with the cable. I didn’t know that there were actually different cables available with the colored wires organized in different orders. I eventually came across this Wiring Diagram which illustrated that the cable that I had purchased actually had the colors reversed from what I was seeing in other diagrams.
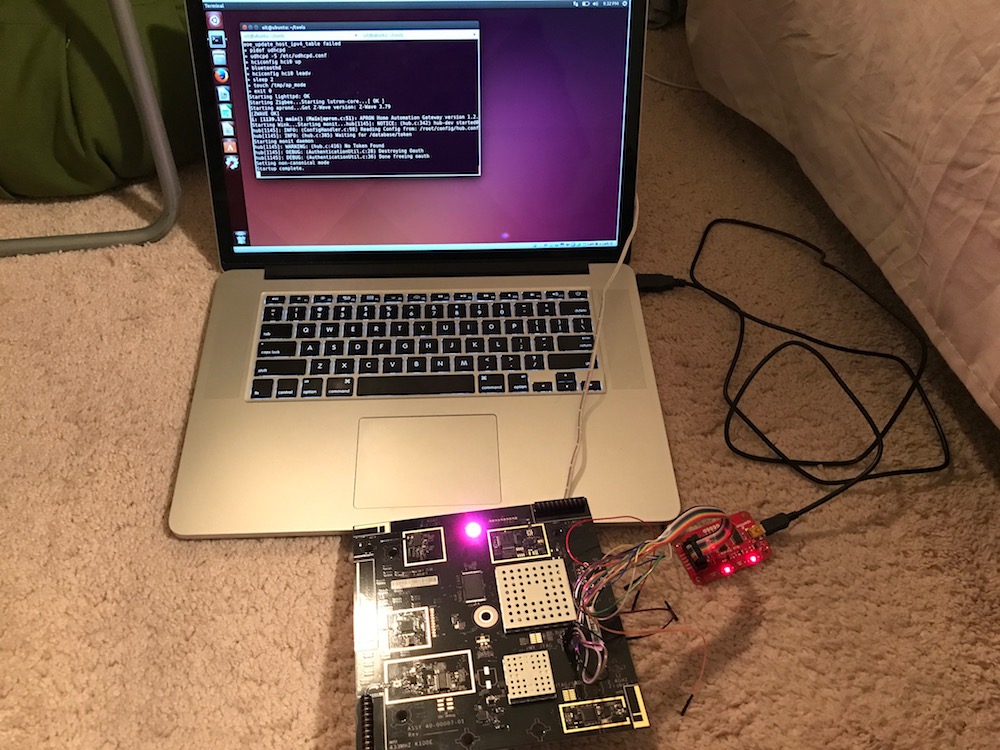
Use Screen to Configure Bus Pirate UART Connection
Once the Bus Pirate was connected, the next step was to configure the Bus Pirate. To configure the device I connected using the command:
sudo screen /dev/ttyUSB0 115200
Once connected, I was presented with a prompt for the Bus Pirate. I believe I actually received a black screen which required me to hit enter to actually see the prompt. Another thing I learned in this project is that serial work can be a little flaky. Through this prompt you configure the Bus Pirate to become a “bridge” which allows UART communication to pass thru the Bus Pirate and to the device you are communicating with.
In this prompt I used “m” to configure the mode of the Bus Pirate as UART. In this configuration wizard all of the defaults are selected except for a baudrate of 115200 and 3.3v as the voltage of the device.
After the UART mode was configured, I started a “Transparent UART
Bridge” via the macro (1).
** NOTE: After setting this up and booting up the Wink Hub, the text on the screen would come out looking like garbage. I did a bunch of Googling and research and it seemed that I also had to set the baudrate using the “b” menu to 115200 prior to setting the mode to UART using the “m” option and going through the wizard. I don’t remember why I had to do this but that seemed to clear up the garbage output.
Short the NAND Flash
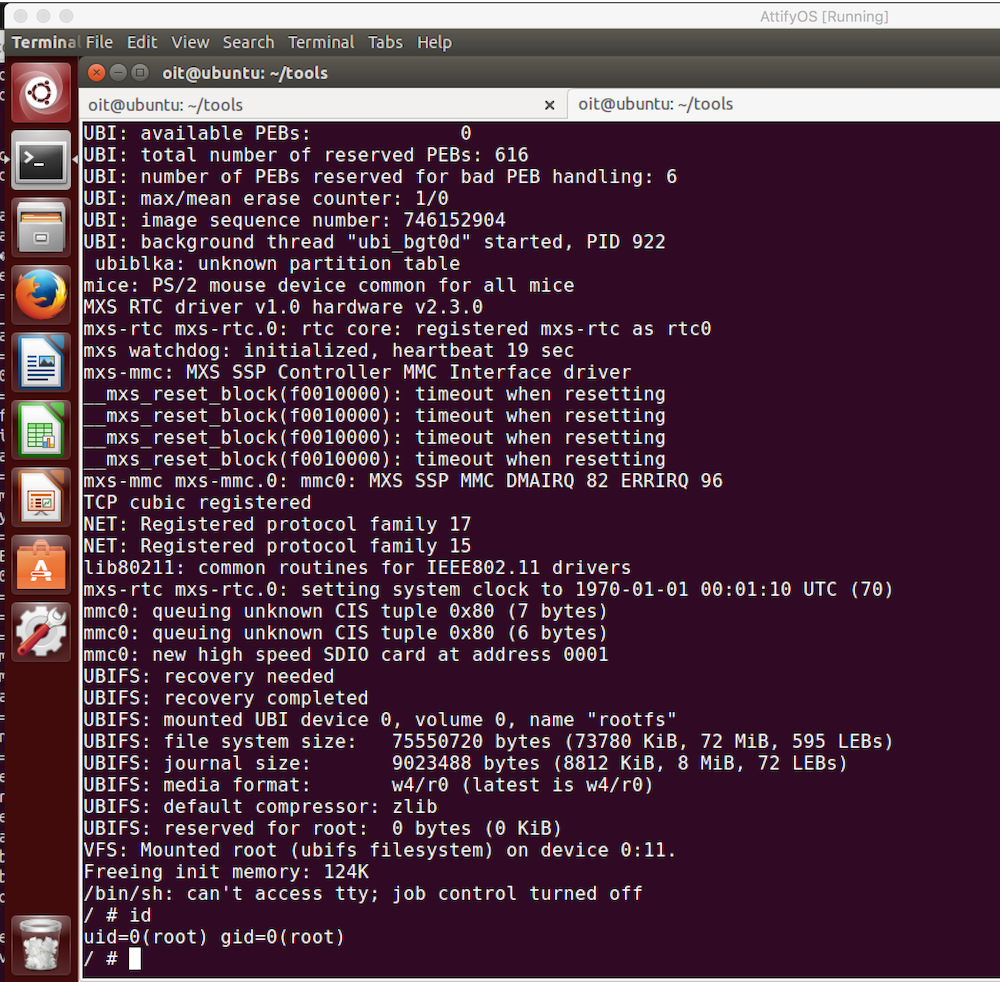
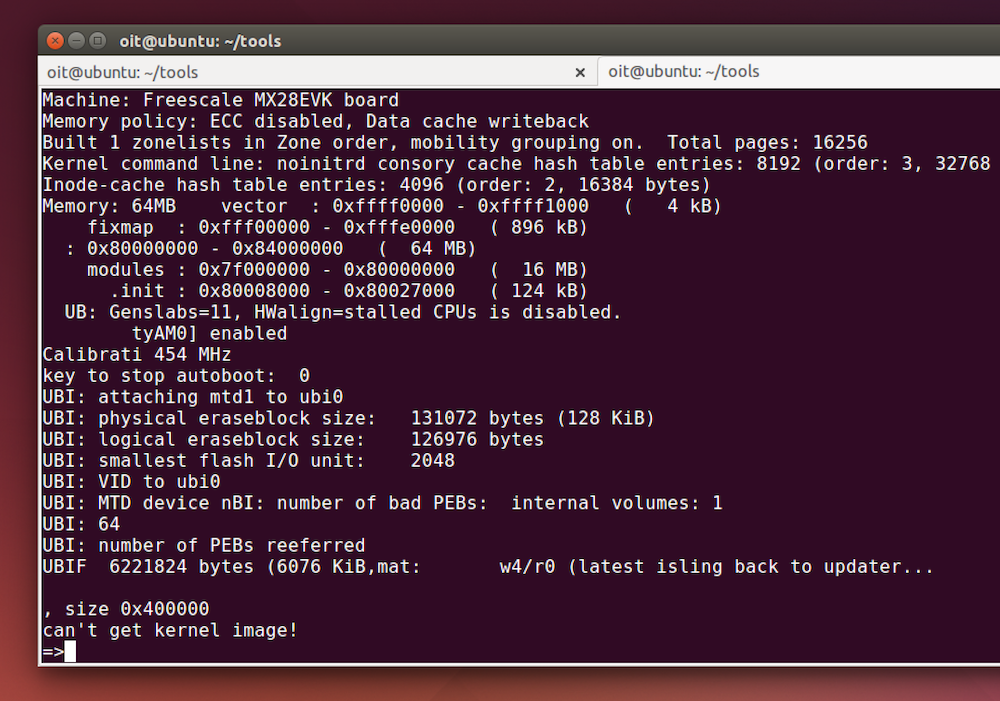
After the Bus Pirate is all configured and a serial screen connection is setup, the next step was to actually start up the Wink Hub and glitch the NAND chip. To perform the glitch I used a piece of wire with one end touching some of the metal chip housing, and the other end touching the 29th pin of the NAND flash. It took a few tries to get to work as I found that I had to create the short in less than a second after starting up the Wink Hub. Other articles I had found on the subject said to create the short after ~1 sec but I found that it needed to happen much sooner than that. As soon as the short worked, I would receive a terminal prompt after a kernel panic message.
Update Boot Args
At this point we have a shell but not a root shell. By executing
printenv we see that the arguments used during boot are:
bootargs=noinitrd console=ttyAM0,115200 rootfstype=ubifs ubi.mtd=5 root=ubi0:rootfs rw gpmi badupdater
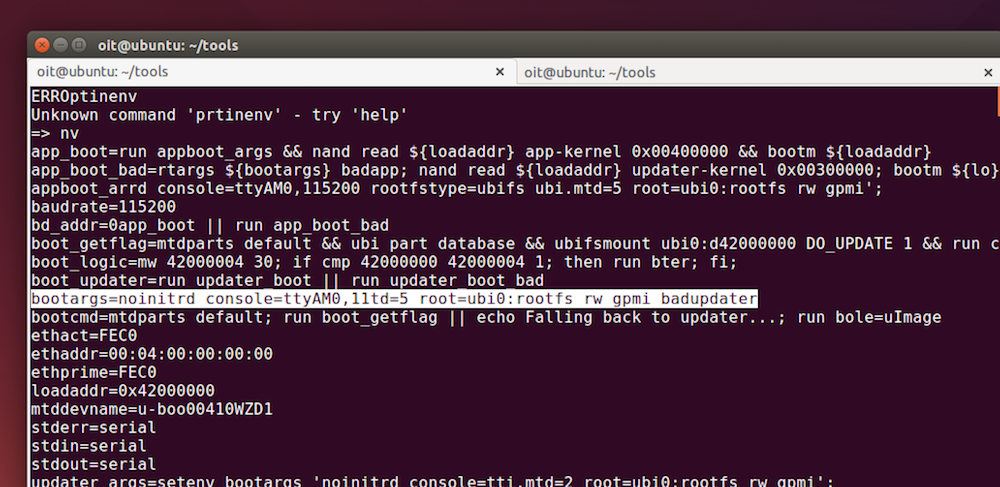
Using setenv we can alter the bootargs that are used at startup and
cause the Wink Hub to boot into a root shell. We use the following
commands to accomplish this:
setenv bootargs 'noinitrd console=ttyAM0,115200 rootfstype=ubifs ubi.mtd=5 root=ubi0:rootfs rw gpmi init=/bin/sh';
And then reboot with:
nand read ${loadaddr} app-kernel 0x00400000 && bootm ${loadaddr}
How did we know init=/bin/sh needed to be added? Well, the course sort of glosses over that detail but a quick google turns up this:
The init= Argument

The kernel defaults to starting the init program at boot, which then
takes care of setting up the computer for users via launching getty
programs, running rc scripts and the like. The kernel first looks
for /sbin/init, then /etc/init (depreciated), and as a last resort, it
will try to use /bin/sh (possibly on /etc/rc). If for example, your
init program got corrupted and thus stopped you from being able to
boot, you could simply use the boot prompt init=/bin/sh which would
drop you directly into a shell at boot, allowing you to replace the
corrupted program.
So adding init=/bin/sh to the bootargs allows for booting directly
into a shell.
How did we know nand read ${loadaddr} app-kernel 0x00400000 && bootm
${loadaddr} would reboot?
Well, this is glossed over in the course as well. Looking at the
“app_boot” environment variable though we can get some clues. It
performs appboot_args which we can guess probably sets up the boot
args that are being modified with /bin/sh. It then proceeds to perform nand read. What does that do?
According to the Uboot README
nand read addr ofs|partition size
Read size bytes from ofs in NAND flash to addr.  Blocks that
are marked bad are skipped.  If a page cannot be read because an
uncorrectable data error is found, the command stops with an error.
So this command reads 0x400000 bytes from the “offset/app-kernel” to
the “loadaddr” location. This seems to be loading the kernel from the
NAND flash into memory. It then proceeds to do bootm ${loadaddr}.
What does the bootm command do?
According to this documentation:
“bootm - boot application image from memory”
So the proceeding commands combined load the kernel into memory and then load the kernel. This provides the reboot.
Enjoy Root!